第一個 Plugin 4:Widget 面板
最後一步:給 Plugin 一個面板,上面一個顯示最後讀值的數值、一顆重讀的按鈕。
使用者不用再打 read,按按鈕就行。這是 Widget 模式:
Plugin 只「描述」要哪些控制項(寫在一個版面檔裡),不管座標、不管怎麼畫,終端機版與視窗版各自負責畫出來。
這一步有三個檔案要放進 plugins\hello_ic\src\:
| 檔案 | 是什麼 |
|---|---|
hello_ic.c | 程式碼,取代原來的 |
hello_ic_panel.nxlay | 面板的設計檔,這份才是真相。Plugin 執行時讀它 |
hello_ic_panel.h | 從 .nxlay 產生出來的標頭(只有控制項編號),hello_ic.c 用它。不要手改 |
.h 放在跟 hello_ic.c 同一個 src\ 目錄,建置的 include 路徑就找得到。
.nxlay 本身要放在編好的 DLL 旁邊(plugins\):這一步用最容易上手的「檔案模式」載入,
LoadLayout() 以 NX_LAYOUT_F_FILE 讀 DLL 所在目錄下的檔案,改了版面不必重新編譯。
要出貨成單一 DLL 時,把版面當成 RCDATA 資源編進去,改用資源名稱載入(見Widget 模式深入)。
原來範本留下的 template_panel.h/template_panel.nxlay 這一步沒用到,可以刪掉。
面板設計檔 hello_ic_panel.nxlay
; hello_ic_panel.nxlay
;
; hello_ic tutorial step 4: the panel layout. This file is the source of
; truth; hello_ic_panel.h is generated from it, never hand-edited.
;
; Two rows, one widget each: a VALUE that shows the last register read,
; and a BUTTON that asks the plugin to read again.
;
; Regenerate the header with:
;   nxlayout --emit-header hello_ic_panel.nxlay hello_ic_panel.h

[w.1]
type=VALUE
y=0
min_w=12
weight=1
h=1
label=LastRead

[w.2]
type=BUTTON
y=1
min_w=8
h=1
label=Read
一個 [w.N] 區段是一個控制項:
type:控制項型別。VALUE是唯讀的「標籤:文字」,BUTTON是按鈕。y:第幾列(0 起算)。這是列,不是像素,也不是終端機的格子座標,因為兩個主程式的格子大小不一樣。min_w:最小寬度(抽象格數)。面板太窄放不下就會被隱藏;你不能假設自己一定看得到。weight:多餘的寬度怎麼分。有weight的控制項會被拉寬;沒有的維持min_w。h:占幾列高。label:標籤文字。
永遠不要在 Plugin 裡寫死座標:你不知道面板多大、字多寬、是終端機還是視窗。 只宣告最小寬度與權重,其餘交給主程式。
產生 hello_ic_panel.h
.h 是用 PDK 附的 nxlayout 工具從 .nxlay 產生的:
<PDK>\tools\x64\nxlayout --emit-header hello_ic_panel.nxlay hello_ic_panel.h(tools\x86\ 也有一份。)下載的 .h 已經幫你產生好了,這一步不用自己跑;
日後你改了 .nxlay,一定要重新跑 nxlayout --emit-header。建置本身不會替你跑這個工具,
也沒有任何東西替你檢查兩個檔案有沒有不同步:.h 檔頭的雜湊值只是給你自己(或你自己的測試)
比對用的;忘了重新產生,程式就會照舊的宣告執行,而且不會有任何錯誤訊息。
沒有想手寫 .nxlay?PDK 的 editor\ 裡有視覺化版面編輯器,可以用滑鼠拖拉排版並直接輸出這兩個檔案。
展開看產生出來的 hello_ic_panel.h(由 nxlayout 產生,永遠不要手改)
hello_ic_panel.h(由 nxlayout 產生,永遠不要手改)/**
* @file HELLO_IC_PANEL
* @brief GENERATED FILE - DO NOT HAND-EDIT.
*
* Source: hello_ic_panel.nxlay
* NXLAY_SOURCE_HASH: fnv1a32:9b80d2fb
*
* Regenerate with:
* nxlayout --emit-header hello_ic_panel.nxlay hello_ic_panel.h
*
* The build never runs codegen: this file is
* committed, and a sync-check test compares the hash above
* against a fresh hash of the .nxlay source's raw bytes.
*
* Widget ids only: the widgets themselves come from the .nxlay resource
* the plugin loads with HostApi::LoadLayout().
*/
#ifndef NXLAY_GEN_HELLO_IC_PANEL_H
#define NXLAY_GEN_HELLO_IC_PANEL_H
#define WIDGET_ID_LASTREAD 1U
#define WIDGET_ID_READ 2U
#define HELLO_IC_PANEL_WIDGET_COUNT 2U
#endif /* NXLAY_GEN_HELLO_IC_PANEL_H */hello_ic.c 用到的只有控制項編號 WIDGET_ID_LASTREAD 與 WIDGET_ID_READ(以及個數 HELLO_IC_PANEL_WIDGET_COUNT);
控制項本身不在標頭裡,是 init() 在執行期從 .nxlay 載入的。
完整程式碼 hello_ic.c
/**
 * @file    hello_ic.c
 * @brief   hello_ic 教學步驟 4:在步驟 3 之上加一個 Widget 面板(一個數值+一顆按鈕)。
 *
 * 新概念只有一個:**Widget 模式的面板**。Plugin 只「宣告」要哪些控件
 * (這裡是一個顯示最後讀值的 VALUE 與一顆 Read 按鈕),不管座標、不管畫法,
 * TUI 與 GUI 兩個主程式各自負責把它畫出來。控件宣告寫在 `hello_ic_panel.nxlay`,
 * `init()` 用 `LoadLayout()` 把它讀進來;`hello_ic_panel.h` 由 `nxlayout` 工具從它產生
 * (只有控件編號),**不要手改**。
 *
 * @see   docs/NEXUS_TUI_PLUGIN_GUIDE.md 第 6 章(Widget 模式)
 */

#include <stdio.h>
#include <string.h>

#include "nexus_plugin_api.h"
#include "plugin_version.h"

/**
 * `hello_ic_panel.h` 是 `nxlayout --emit-header` 從 `hello_ic_panel.nxlay`
 * 產生的檔案:裡面有控件個數 `HELLO_IC_PANEL_WIDGET_COUNT`,以及每個控件的編號
 * `WIDGET_ID_LASTREAD`、`WIDGET_ID_READ`。
 * 把 `hello_ic_panel.h` 與 `hello_ic_panel.nxlay` 跟 `hello_ic.c` 放在
 * 同一個 `src/` 目錄,建置的 include 路徑就找得到 `.h`;`.nxlay` 本身則放在
 * 編好的 DLL 旁邊(見 `HELLO_IC_LAYOUT`)。
 */
#include "hello_ic_panel.h"

/**
 * @brief 本 Plugin 對外的名稱。
 * @note  使用者在指令列打 `plugin list` 會看到它,打 `p hello_ic` 就掛載它。
 */
#define HELLO_IC_NAME   "hello_ic"

/**
 * @brief 面板版面檔的檔名:`LoadLayout()` 以 `NX_LAYOUT_F_FILE` 讀它,相對於 DLL 所在目錄。
 * @note  這是「檔案模式」,最容易上手:把 `hello_ic_panel.nxlay` 跟 `hello_ic.dll` 放在同一個目錄。
 *        要出貨成單一 DLL,可改成把版面當成 `RCDATA` 資源編進去,然後以資源名稱載入
 *        (`LoadLayout(ctx, 0, "HELLO_IC_PANEL", 0)`)。
 */
#define HELLO_IC_LAYOUT "hello_ic_panel.nxlay"

/**
 * @brief 你的 IC 的 7-bit I2C 位址。
 * @note  **請改成你自己的 IC 的位址。** 不知道位址時,在主程式指令列打 `scan`,
 *        它會列出匯流排上有回應的所有 7-bit 位址。本教學預設 0x58
 *        (模擬後端 mock 預設就有一顆 0x58)。
 */
#define HELLO_IC_ADDR   0x58

/**
 * @brief 本 Plugin 對外宣告的 slave 位址表(至少要有一列,否則 Core 拒載)。
 *
 * @note  欄位依序是:位址、位址模式(8-bit 暫存器位移)、bank 模式(無 bank)、
 *        bank 暫存器、bank 遮罩、旗標、保留、顯示名稱。
 * @warning 必須是靜態儲存期:Core 只讀不釋放,所以不能是函式內的區域變數。
 */
static const NxSlaveDecl s_slaves[] =
{
    { HELLO_IC_ADDR, NX_ADDR_MODE_8BIT, NX_BANK_MODE_NONE, 0, 0, 0, { 0, 0 }, "hello_ic" }
};

/**
 * @brief Core 提供的服務函式表,`init()` 時存下來,之後的 callback 才用得到。
 * @note  生命期涵蓋整個行程;不得修改其內容、不得釋放。
 */
static const NxHostApi *s_host = (const NxHostApi *)0;

/**
 * @brief 更新「最後讀值」那個 VALUE 控件的文字。
 *
 * @param[in] ctx  本次掛載的上下文
 * @param[in] text 要顯示的字串;不得為 `NULL`
 * @return 無
 *
 * @note  控件的狀態只存在 Core,Plugin 只送出新值、自己不留副本。
 * @note  `SetWidgetProp()` 第二個參數是面板編號;本 Plugin 只有一個面板,傳 0。
 *        `VALUE` 控件的值是字串(`NX_WKIND_STR`);Plugin 自己設值不會產生事件。
 */
static void hello_ic_show(NxPluginCtx ctx, const char *text)
{
    NxPropVal v;

    memset(&v, 0, sizeof(v));
    v.SizeOfStruct = (NxDword)sizeof(v);
    v.kind         = (NxWord)NX_WKIND_STR;
    v.u.str.ptr    = text;
    v.u.str.len    = (NxDword)strlen(text);

    (void)s_host->SetWidgetProp(ctx, 0, WIDGET_ID_LASTREAD, NX_WP_VALUE, &v);
}

/**
 * @brief 讀 IC 的暫存器 0x00,把結果寫進 Log 並更新面板。`read` 指令與 Read 按鈕共用。
 *
 * @param[in] ctx 本次掛載的上下文
 * @return `ERR_OK`,或 `ExecSync()` 失敗時的錯誤碼(同時已寫進 Log 並顯示在面板上)。
 *
 * @warning 只能在 **I2C Worker Thread** 上呼叫:`ExecSync()` 在 UI Thread 上
 *          一律回 `ERR_WRONG_THREAD`(-85)。本檔的兩個呼叫端
 *          (自訂指令、`on_widget_event`)剛好都在 Worker Thread。
 * @note    `memset` 清成全 0 就是全部的設定:位址 0 代表「用這次掛載當下的位址」,
 *          bank 與後端也沿用掛載的設定。
 */
static NxLong hello_ic_do_read(NxPluginCtx ctx)
{
    NxJobRequest req;
    NxByte       value;
    NxLong       rc;
    char         line[64];

    memset(&req, 0, sizeof(req));
    req.size_of_struct = (NxDword)sizeof(req);
    req.op     = NX_JOB_READ;
    req.offset = 0x00;
    req.length = 1;
    rc = s_host->ExecSync(ctx, &req, &value, (NxWord)sizeof(value));
    if (rc != ERR_OK)
    {
        sprintf(line, "hello_ic: read 0x00 failed, rc=%ld", (long)rc);
        s_host->LogWrite(ctx, NX_LOG_WARN, line);
        hello_ic_show(ctx, "error");
        return rc;
    }

    sprintf(line, "0x%02X", (unsigned)value);
    hello_ic_show(ctx, line);
    sprintf(line, "hello_ic: reg 0x00 = 0x%02X", (unsigned)value);
    s_host->LogWrite(ctx, NX_LOG_INFO, line);
    return ERR_OK;
}

/**
 * @brief Plugin 掛載時的初始化,Core 在 **UI Thread** 上呼叫。
 *
 * @param[in] ctx  本次掛載的上下文
 * @param[in] host HostAPI 函式表
 * @return `ERR_OK` 表示成功;載入版面失敗時回傳其錯誤碼,這次掛載中止。
 *
 * @warning 在 UI Thread 上執行,不得做 I2C 存取或任何會阻塞的事。
 * @note    版面只在這裡載入**一次**:內容真的不同時重新載入會丟掉各控件的值,
 *          所以不要每幀重載。第二個參數 0 是面板編號。
 */
static NxLong NX_CALL hello_ic_init(NxPluginCtx ctx, const NxHostApi *host)
{
    NxLong rc;

    s_host = host;

    rc = host->LoadLayout(ctx, 0, HELLO_IC_LAYOUT, NX_LAYOUT_F_FILE);
    if (rc != ERR_OK)
    {
        return rc;
    }

    hello_ic_show(ctx, "--");
    host->LogWrite(ctx, NX_LOG_INFO, "hello_ic: loaded");
    return ERR_OK;
}

/**
 * @brief Plugin 卸載時的清理。**強制實作,不得為 `NULL`。**
 *
 * @param[in] ctx 本次掛載的上下文
 * @return 無
 *
 * @warning 在 **I2C Worker Thread** 上呼叫,返回後 `ctx` 立即失效。
 * @note    把 `s_host` 清掉:卸載之後任何遲到的呼叫都不該再碰 HostAPI。
 */
static void NX_CALL hello_ic_cleanup(NxPluginCtx ctx)
{
    NX_UNUSED_ARG(ctx);
    s_host = (const NxHostApi *)0;
}

/**
 * @brief Widget 互動事件:使用者按下 Read 按鈕時,Core 會呼叫這裡。
 *
 * @param[in] ctx       本次掛載的上下文
 * @param[in] panel_id  發生事件的面板編號
 * @param[in] widget_id 發生事件的控件編號(`hello_ic_panel.h` 裡的 `WIDGET_ID_*`)
 * @param[in] evt       事件,只在本次呼叫期間有效;按鈕被按下是 `evt->kind == NX_WEVT_ACTIVATED`
 *                      (`evt->val` 是點擊位置,這裡用不到)
 * @return 無
 *
 * @warning 在 **I2C Worker Thread** 上呼叫——這正是可以在這裡直接讀 I2C 的原因,
 *          畫面不會被卡住。
 */
static void NX_CALL hello_ic_on_widget_event(NxPluginCtx ctx, NxByte panel_id,
                                             NxWord widget_id, const NxWidgetEvent *evt)
{
    NxLong rc;

    NX_UNUSED_ARG(panel_id);

    if (widget_id == WIDGET_ID_READ && evt->kind == NX_WEVT_ACTIVATED)
    {
        /* 這個 callback 沒有回傳值可以交給主程式,失敗只能自己記 Log。 */
        rc = hello_ic_do_read(ctx);
        if (rc != ERR_OK)
        {
            s_host->LogWrite(ctx, NX_LOG_WARN, "hello_ic: Read button failed");
        }
    }
}

/**
 * @brief 自訂指令 `hello` 的處理函式:寫一行 Log,回 `ERR_OK`。
 *
 * @param[in] ctx  本次掛載的上下文
 * @param[in] argc 參數個數(含指令本身)
 * @param[in] argv 參數陣列;只在本次呼叫期間有效
 * @return `ERR_OK`。指令處理函式自己的回傳值就是這次指令的結果:
 *         回 `ERR_OK` 或錯誤碼;非 `ERR_OK` 時主程式會顯示錯誤。
 *         (batch 模式下,非 ERR_OK 的回傳值會成為 Exit Code 的絕對值。)
 *
 * @warning 在 **I2C Worker Thread** 上呼叫。
 */
static NxLong NX_CALL hello_ic_cmd_hello(NxPluginCtx ctx, int argc, const char *const *argv)
{
    NX_UNUSED_ARG(argc);
    NX_UNUSED_ARG(argv);
    s_host->LogWrite(ctx, NX_LOG_INFO, "hello_ic: hello!");
    return ERR_OK;
}

/**
 * @brief 自訂指令 `read` 的處理函式:等同按下面板上的 Read 按鈕。
 *
 * @param[in] ctx  本次掛載的上下文
 * @param[in] argc 參數個數(含指令本身)
 * @param[in] argv 參數陣列;只在本次呼叫期間有效
 * @return `ERR_OK`,或 `ExecSync()` 失敗時的錯誤碼;非 `ERR_OK` 時主程式會顯示錯誤。
 *         (batch 模式下,非 ERR_OK 的回傳值會成為 Exit Code 的絕對值。)
 *
 * @warning 在 **I2C Worker Thread** 上呼叫,所以可以直接讀 I2C。
 */
static NxLong NX_CALL hello_ic_cmd_read(NxPluginCtx ctx, int argc, const char *const *argv)
{
    NX_UNUSED_ARG(argc);
    NX_UNUSED_ARG(argv);
    return hello_ic_do_read(ctx);
}

/**
 * @brief 本 Plugin 的自訂指令表:名稱、`help` 說明、用法、處理函式。
 *
 * @note  靜態生命期,Core 只讀不釋放。
 * @warning 說明字串請用純 ASCII 收尾(VC6 以 CP950 掃描原始碼,中文結尾的
 *          字串會讓引號無法關閉);這裡整段用英文最保險。
 */
static const NxCommandDef s_commands[] =
{
    { "hello", "say hello in the log", "hello", hello_ic_cmd_hello },
    { "read",  "read register 0x00 and log it", "read", hello_ic_cmd_read }
};

/**
 * @brief 本 Plugin 的能力宣告,Core 只讀不釋放。
 *
 * @note  必須是靜態儲存期:靜態變數一開始全是 0,而 0 對每一個選用 callback
 *        而言正是「我不提供」。
 */
static IcPlugin s_plugin;

/**
 * @brief Plugin DLL 的進入點:Core 載入 DLL 之後第一個呼叫的函式。
 *
 * @param[in] host_abi_major Host 端的 `NX_PLUGIN_ABI_MAJOR`
 * @param[in] host_abi_minor Host 端的 `NX_PLUGIN_ABI_MINOR`(本函式刻意不比較:minor 不同不是拒載的理由)
 * @return 指向靜態生命期 `IcPlugin` 的指標;ABI major 不相容時回傳 `NULL`。
 *
 * @warning 在 UI Thread 上呼叫,不得做 I2C 存取或阻塞操作。
 * @note    欄位一律用**具名賦值**填寫,沒填的欄位維持 0(=不提供該 callback)。
 *          這一步把 `panel_mode` 改成 `NX_PANEL_MODE_WIDGET` 並掛上 `on_widget_event`。
 */
NX_PLUGIN_EXPORT struct IcPlugin * NX_CALL NexusPluginGetInterface(NxDword host_abi_major,
                                                                   NxDword host_abi_minor)
{
    NX_UNUSED_ARG(host_abi_minor);

    if (host_abi_major != NX_PLUGIN_ABI_MAJOR)
    {
        return (struct IcPlugin *)0;
    }

    s_plugin.abi_major       = NX_PLUGIN_ABI_MAJOR;
    s_plugin.abi_minor       = NX_PLUGIN_ABI_MINOR;
    s_plugin.size_of_struct  = sizeof(IcPlugin);

    s_plugin.name            = HELLO_IC_NAME;
    s_plugin.description     = "hello_ic tutorial plugin";

    s_plugin.slaves          = s_slaves;
    s_plugin.slave_count     = (NxByte)(sizeof(s_slaves) / sizeof(s_slaves[0]));
    s_plugin.slave_decl_size = (NxDword)sizeof(NxSlaveDecl);
    s_plugin.panel_mode      = NX_PANEL_MODE_WIDGET;

    s_plugin.init            = hello_ic_init;
    s_plugin.cleanup         = hello_ic_cleanup;
    s_plugin.on_widget_event = hello_ic_on_widget_event;

    s_plugin.commands        = s_commands;
    s_plugin.command_count   = (NxWord)(sizeof(s_commands) / sizeof(s_commands[0]));

    s_plugin.version_major   = (NxWord)PLUGIN_VER_MAJOR;
    s_plugin.version_minor   = (NxWord)PLUGIN_VER_MINOR;
    s_plugin.version_patch   = (NxWord)PLUGIN_VER_PATCH;

    return &s_plugin;
}
新增了什麼
1. #include "hello_ic_panel.h":引進上面那些宣告。
2. init() 裡載入版面,而且只載入一次:
rc = host->LoadLayout(ctx, 0, "hello_ic_panel.nxlay", NX_LAYOUT_F_FILE);第二個參數 0 是面板編號(這顆 Plugin 只有一個面板)。版面內容一旦真的改變,
視窗版就會把控制項整組重建,重建會讓使用者打到一半的字消失,所以在 init() 載一次就好,
不要每幀重載(內容完全相同的重複載入是 no-op,但沒有必要)。載入失敗(找不到檔案、版面不合法)
會回傳錯誤碼,init() 把它原樣回傳,這次掛載就中止。
3. hello_ic_show():更新數值。
v.SizeOfStruct = (NxDword)sizeof(v);
v.kind         = (NxWord)NX_WKIND_STR;
v.u.str.ptr    = text;
v.u.str.len    = (NxDword)strlen(text);
s_host->SetWidgetProp(ctx, 0, WIDGET_ID_LASTREAD, NX_WP_VALUE, &v);
控制項的狀態只存在 Core 裡,Plugin 只負責送出新值,自己不留副本(字串在呼叫返回時已複製)。
SetWidgetProp() 可以在 Worker Thread 呼叫,不需要碰任何畫面的東西。
4. hello_ic_do_read():把步驟 3 的讀取抽出來,讀完除了寫 Log,還呼叫
hello_ic_show() 更新面板;失敗時面板顯示 error。read 指令與按鈕共用它。
5. hello_ic_on_widget_event():使用者按按鈕時,Core 呼叫它。
if (widget_id == WIDGET_ID_READ && evt->kind == NX_WEVT_ACTIVATED)
{
    rc = hello_ic_do_read(ctx);
    ...
}
NX_WEVT_ACTIVATED 是「按鈕被按下」。這個 callback 跑在 I2C Worker Thread——
這正是可以直接呼叫 ExecSync() 的原因,讀 I2C 時畫面不會被卡住。
6. 兩個欄位的改動:
s_plugin.panel_mode      = NX_PANEL_MODE_WIDGET;
s_plugin.on_widget_event = hello_ic_on_widget_event;
panel_mode 從 NX_PANEL_MODE_NONE 改成 NX_PANEL_MODE_WIDGET,並把事件 callback 掛上。
規則細節見Widget 模式深入與Widget 型別詳解。
建置、載入、執行
-
hello_ic.c與hello_ic_panel.h放進src\,重新建置;把新的hello_ic.dll和hello_ic_panel.nxlay一起複製進plugins\(兩個檔案放在同一個資料夾),關掉主程式重開。 -
面板需要一個放它的位置:用
@p0(左上角那一格)掛上去。因為 Plugin 有 widget 面板, 主程式會自動把那一格改成 Plugin Widget 面板(會回應panel type set to ...), 不需要先用layout指令設定:plugin switch hello_ic @p0 -
面板上出現
LastRead: --與一顆 Read 按鈕。按它,數值就變成讀到的暫存器值:- 視窗版:直接用滑鼠點按鈕。
- 終端機版:先按
F6把焦點移到面板,按Tab選到按鈕(它會反白成強調色),再按Enter。
打
read指令也會更新同一個數值,兩條路共用同一段讀取程式碼。
按下 Read 之後的樣子:
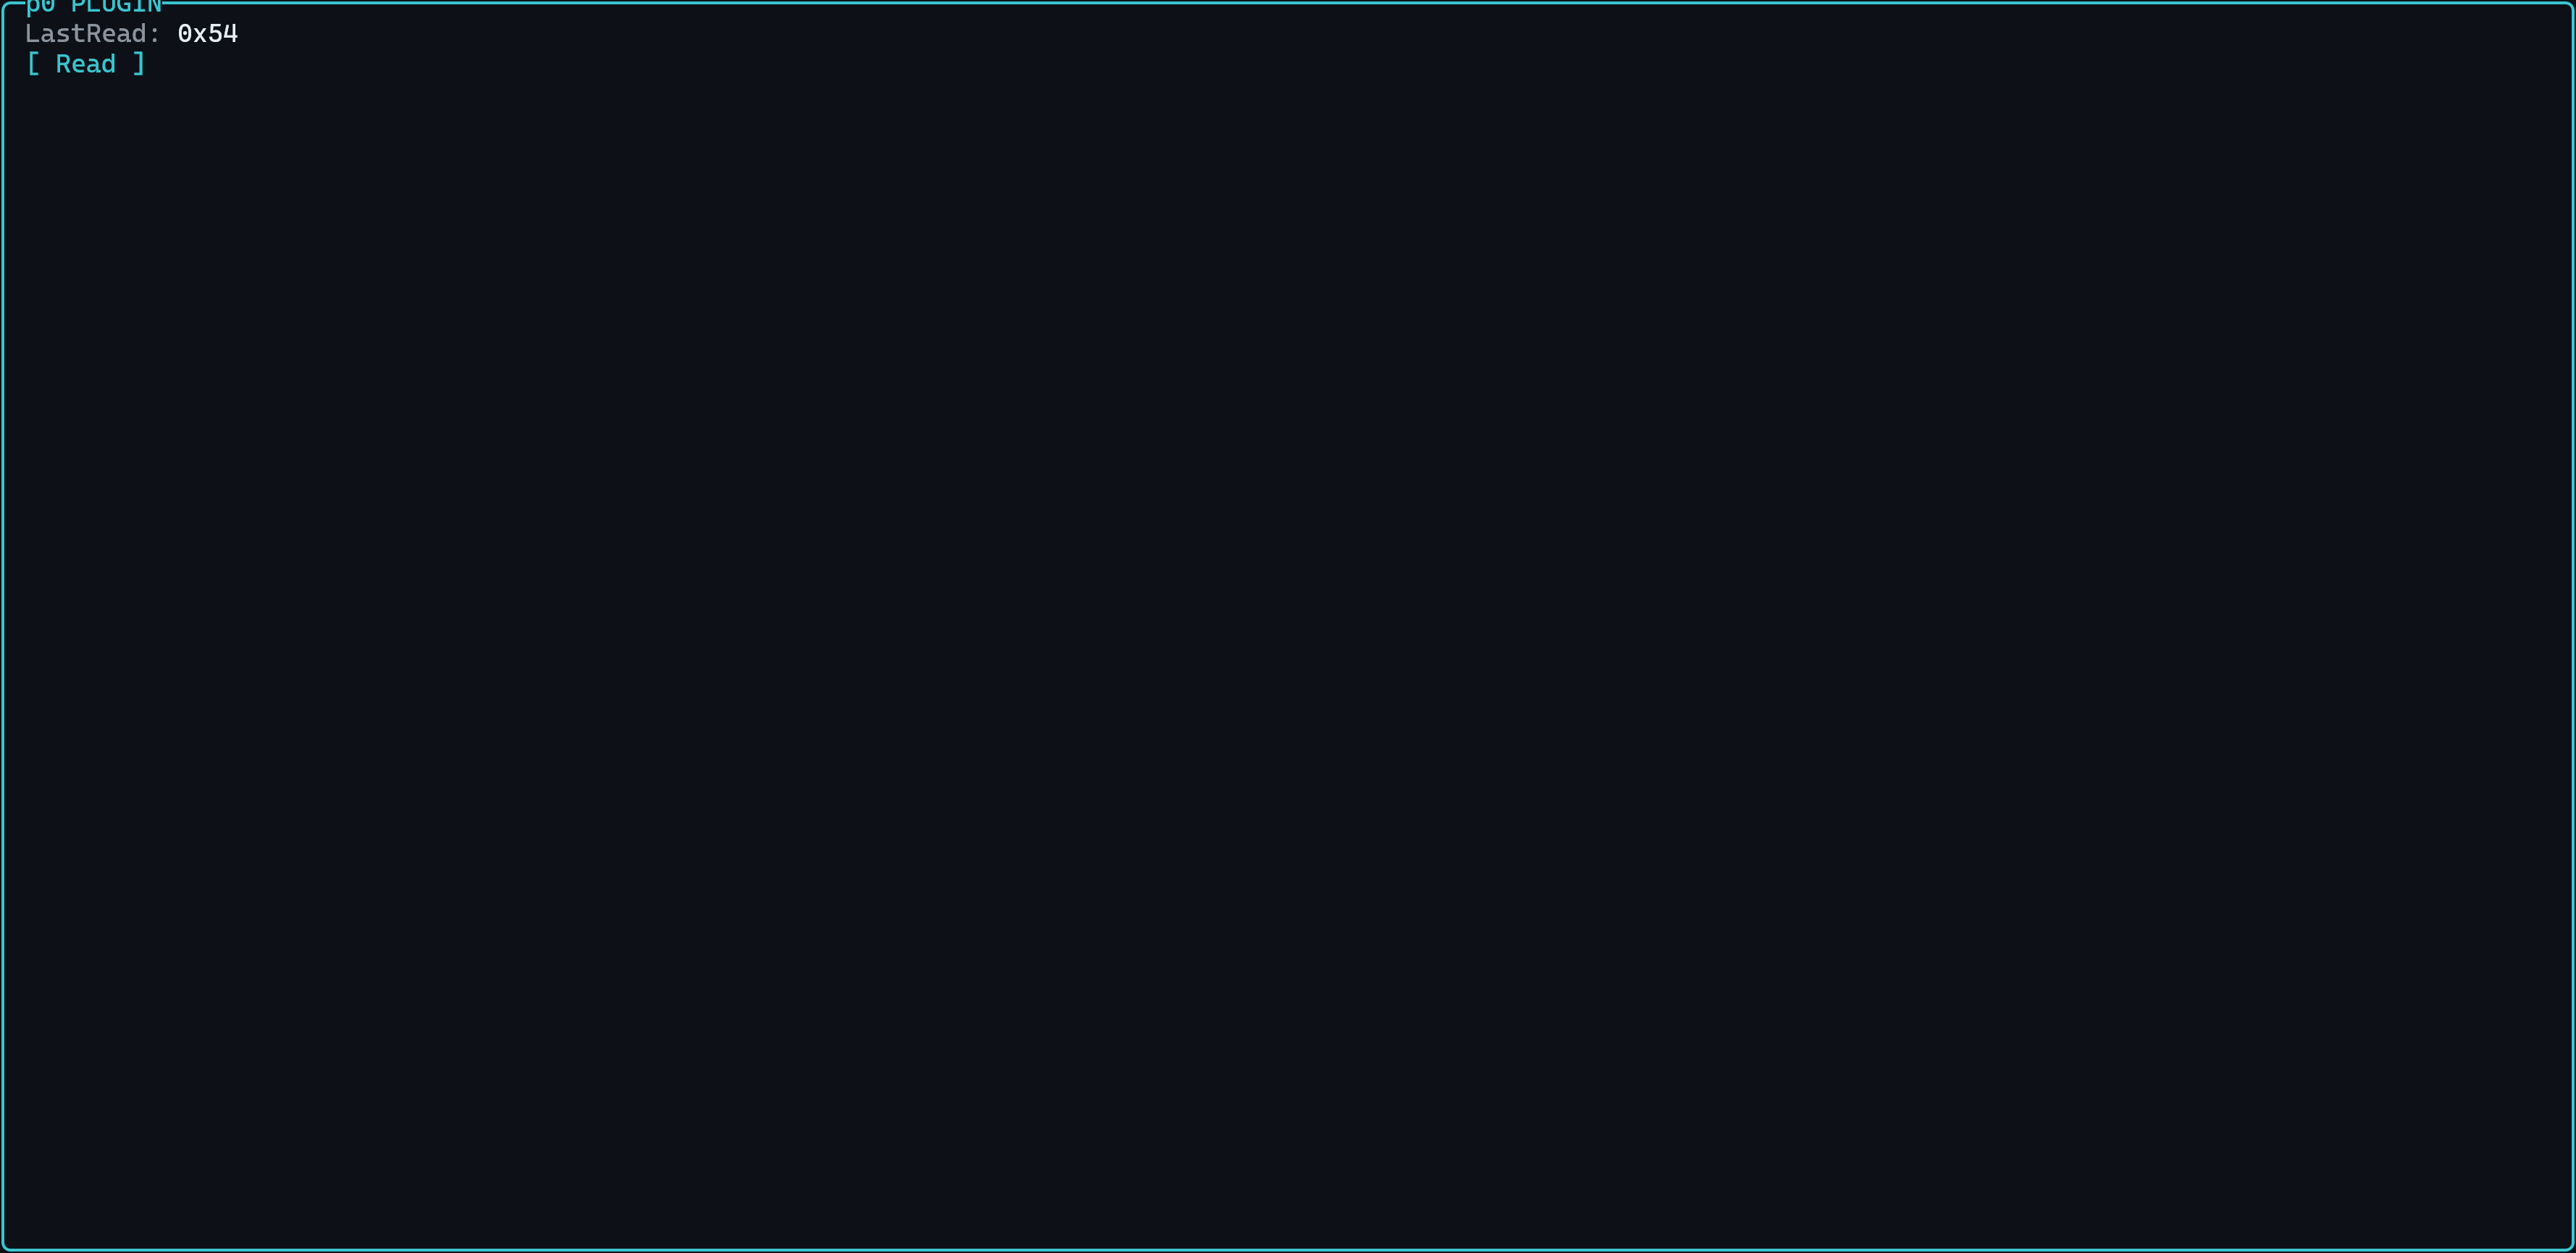
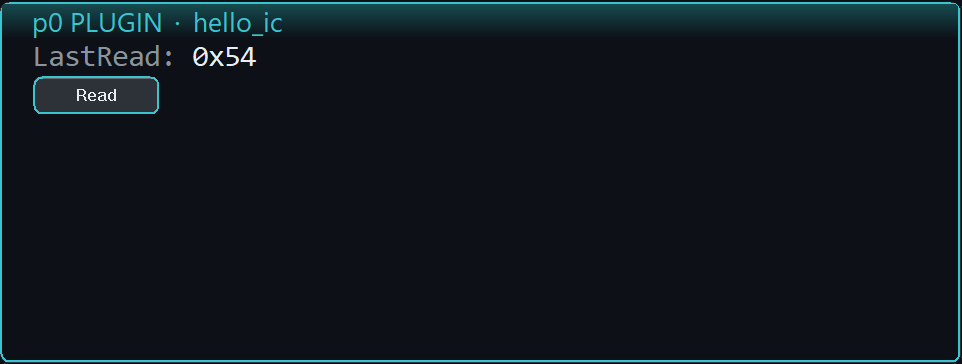
用 read 指令更新同一個數值,畫面是一樣的:
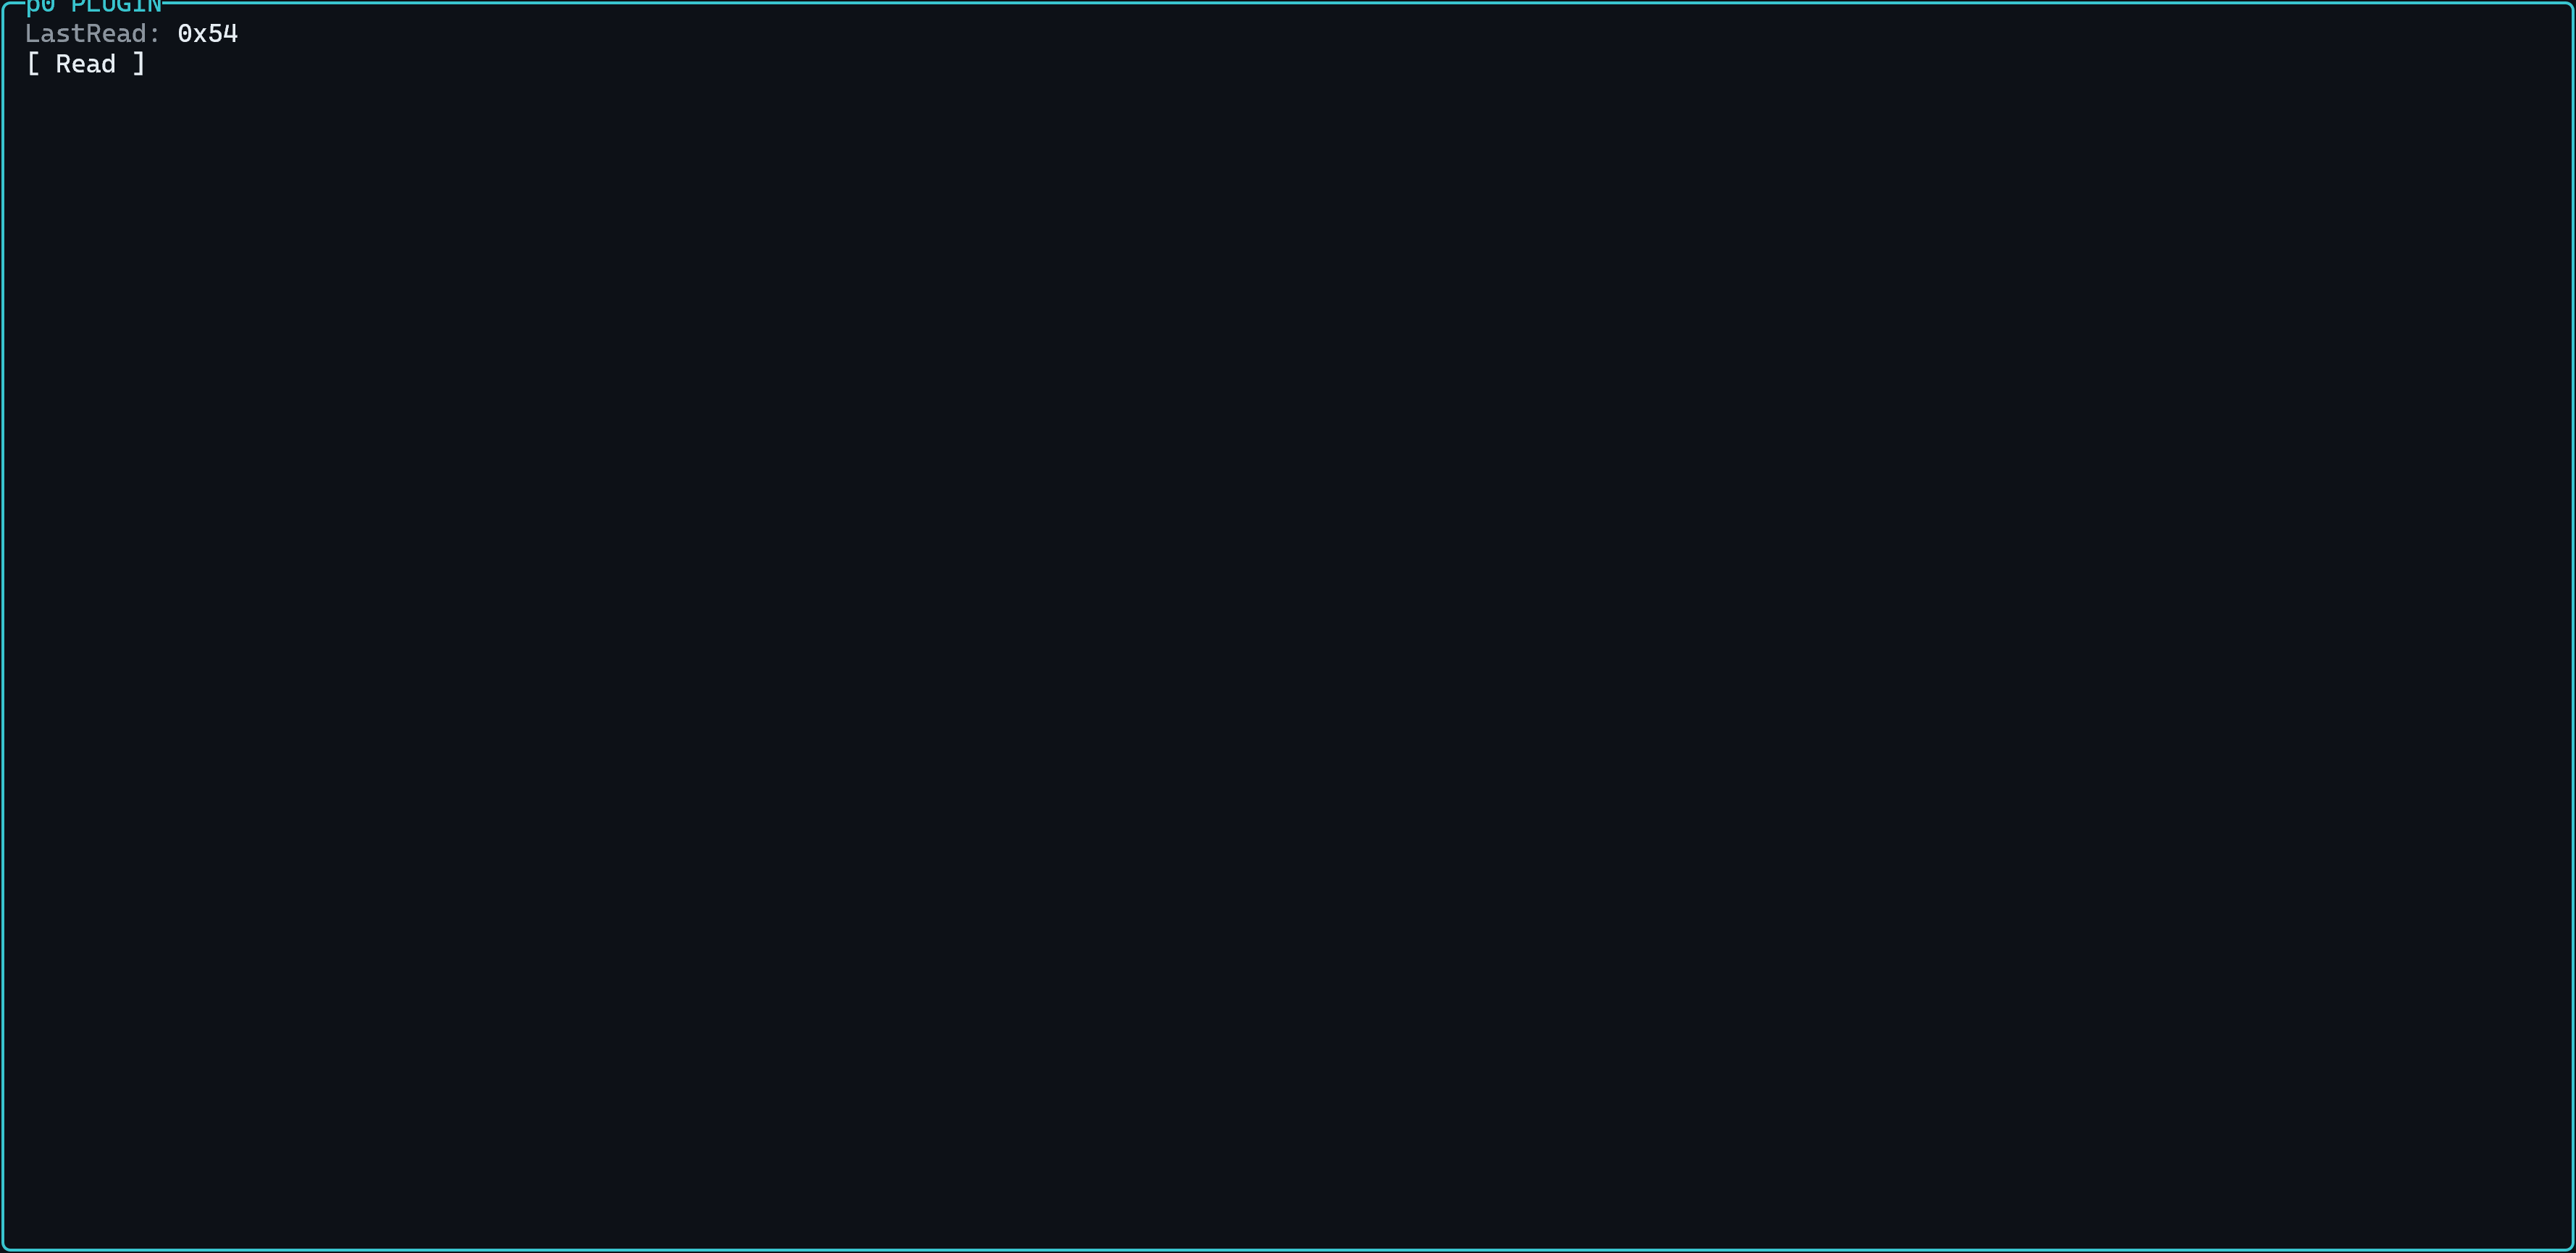
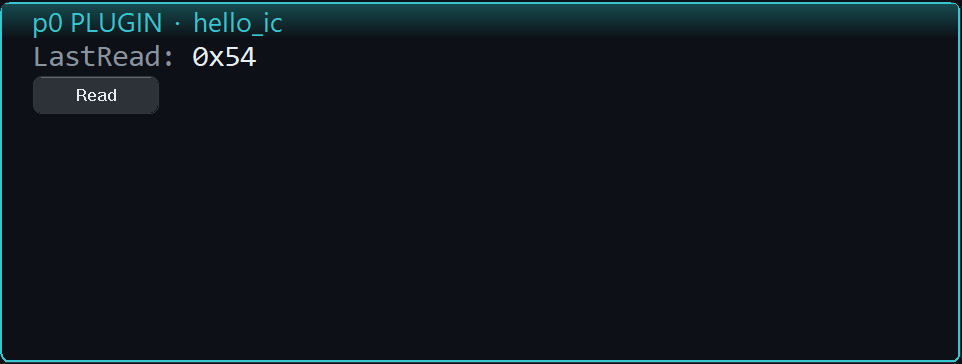
這幾張圖的 0x54 是實體 IC 在 0x58 的暫存器 0x00 讀回來的值,你的數字取決於你的 IC。
同一份宣告、同一份程式碼,兩個主程式各自畫出自己的樣子。
恭喜,你做出第一顆 Plugin 了
hello_ic 走完了一顆 Plugin 的完整骨架:進入點、IcPlugin 表、指令、ExecSync() 讀硬體、
Widget 面板與事件。接下來你可以:
- 把
read改成你的 IC 真正需要的操作:初始化序列、換算溫度、切換模式。 - 用目錄裡的其他範例當下一步的參考:
widget_demo展示每一種 Widget 型別,canvas_demo自己畫整個面板,port_demo把既有 C 韌體搬進 Plugin。 - 接著讀生命週期與執行緒、讀寫硬體的三種方式、設定持久化、版本號與 ABI 相容,補上本教學沒涵蓋的部分;逐支函式的精確規格查 PDK 內的 API 參考。
- 寫好之後怎麼交到使用者手上,見把 Plugin 交給使用者;出問題見除錯與常見錯誤。